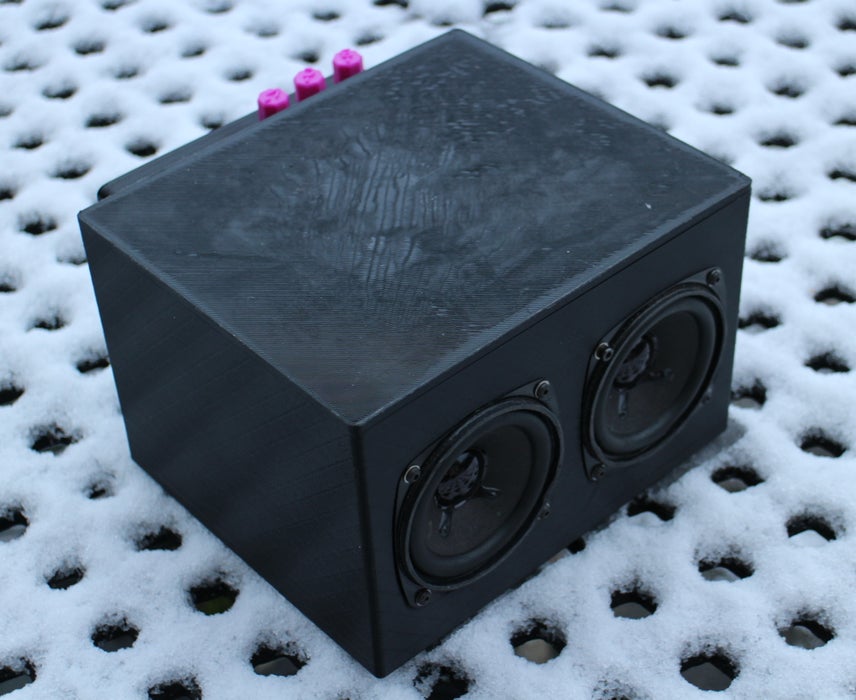
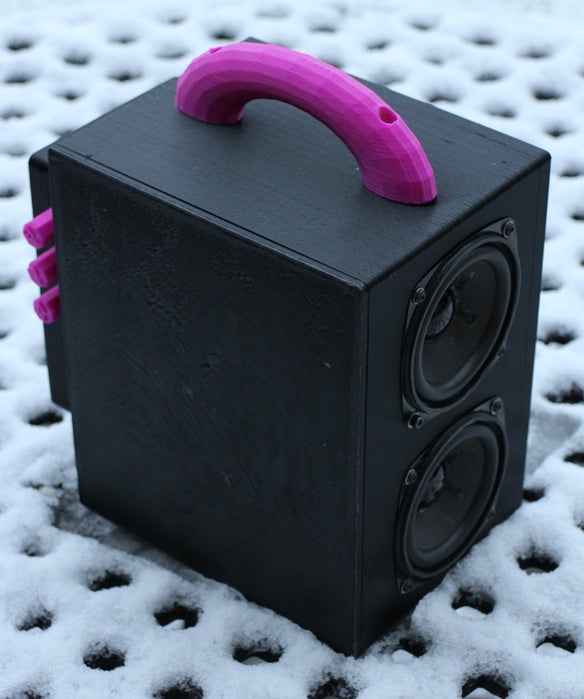
Aim of the Project
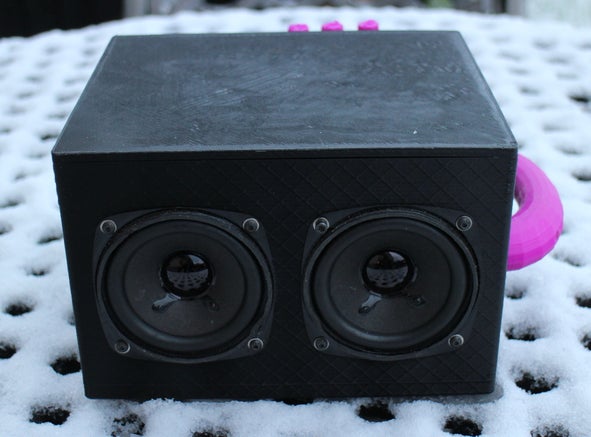
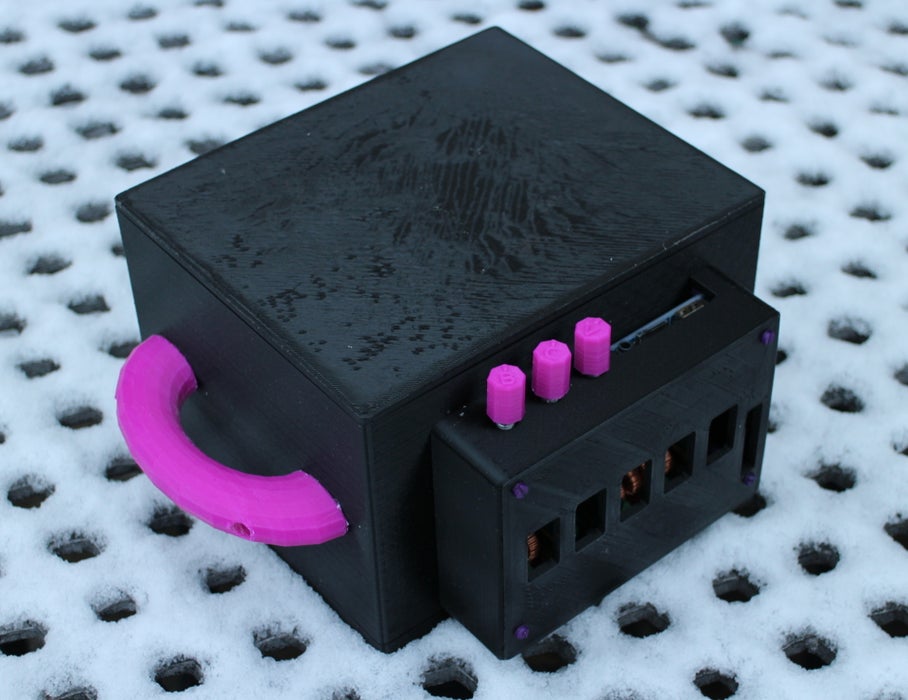
The aim of the project was to produce a small ( 190 x 160 x 125mm ) portable battery operated bluetooth speaker system that sounds louder than the average cheap portable speaker. I also wanted to see what kind of audio quality I could get from one of the new Class D amplifiers using a 3D printed case for the speaker box and some inexpensive speakers.
If you are good at wood working you could make a speaker this size quicker than the almost two days it could take you to print all the parts for this project. However, it appears that if you print a solid box in PLA plastic it does make a decent sounding small speaker. The material is strong and inflexible when printed right which is exactly what you want for a speaker box.
Anyone who was really keen could print two of these out and use two speakers for each channel wired together for four speakers in total
I went with 8cm 3.3” speakers for this project because I can just about fit a box for two of those on my 200x200mm print bed.
When powered by a suitable battery it is possible to get more than 24 of battery life out of this speaker even at when the volume is cranked up.
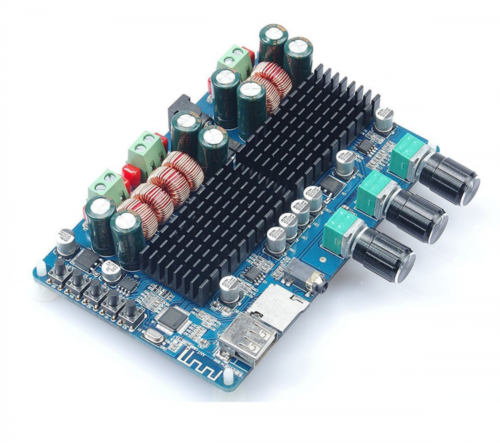
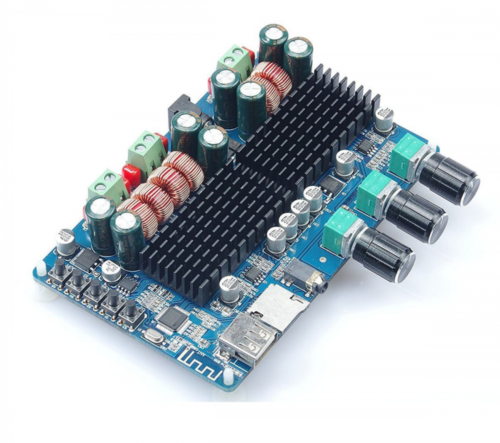
The amplifier board I chose has a traditional line in which gives the best audio quality for music, a bluetooth connection which is great for playing music from phones with, an SD card slot which allows you to load music up and use it as a stand alone MP3 player and a USB slot for USB memory sticks with MP3s on. It makes a nice little audio centre.
It runs from 12 to 24 volts DC so I use a Lithium Polymer battery pack when I need it to be portable. I use a laptop mains adapters when I have access to mains power. An 18650 battery pack built to the right voltage (4 to 6 cells in series would be good) would last a while.
This is not a project for the extreme audiophile. The box was designed using ‘that looks about right’ instead of maths and the class D amplifiers are great for efficiency but the quality isn’t as good as a ‘proper’ traditional amplifier. Though you wouldn’t get more than 24 hours battery life out of one of those from the same battery pack. It sounds better to me than any of the computer speakers I’ve had over the years and almost as good as my proper speaker system. It’s about on par with a good car stereo.
I made the walls of the speaker 9mm thick. That’s partly why it takes so long to print but it wouldn’t sound as good with thin and bendy walls.
Step 1: Parts Description Speakers
Speakers
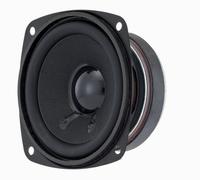
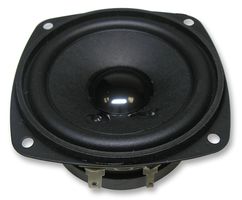
I didn’t put much thought into which speakers to get beyond matching the size to the case, the ohms to the amplifier board and the cost to my limited budget. In the end I went for the visaton Frs 8
http://www.visaton.com/en/industrie/breitband/frs8…
This is an 8 ohm speaker. The amplifier you use has to be capable of driving 8 ohm speakers or you may have problems. Most suitable amplifier boards will do 4-8 ohms but check before buying.
You could use different 8cm 3.3” speakers if you wanted to use something better. I couldn’t guarantee it would fit in the speaker box as I’ve designed it so take a look at my Tinkercad files if you do that and adjust the dimensions if necessary.
Specifications
8 cm (3.3″) HiFi fullrange driver. Linear frequency response between 200 and 20000 Hz. Suitable for sur-round effect speakers, mini sub/sat systems. Due to the small size very suitable for model construction and as control speaker for electronic devices.
Rated power 30 W
Maximum power 50 W
Nominal impedance Z 8 Ohm
Frequency response 100–20000 Hz
Step 2: Parts Description Amplifier Board
Amplifier board
This project makes use of a class D amplifier board. These have now become available cheaply on ebay and elsewhere because they are being mass produced for things like car audio systems. Class D amplifiers are particularly good for producing large amounts of audio volume for relatively little power input. They are a bit like switching power supplies vs linear; they produce much less heat and are much more efficient for high power applications. They are also physically much smaller than traditional amps. The downside is that like switching power supplies vs linear they also produce more noise so the audio quality isn’t as close to perfect as it a high quality traditional amp could manage.
I went for the ‘WINGONEER TPA3116 50W*2+100W 2.1 Vehicle bluetooth Receivers Board Dual Channel’ which I found on ebay for about £33.
The board I chose has a lot of built in features like bluetooth, mp3 file playback as well as a traditional audio jack. You can buy much cheaper boards if you don’t want all the features but you may have to adjust the mounting holes on the back of the speaker so that you can mount it properly if you do that.
Specifications
Output power: 50W+50W+100W subwoofer
Supply Voltage: DC 12-26V
Recommended Power Supply: 24V DC >5A
Chip Type: TPA3116
Channel Type: Left Channel, Right Channel
Subwoofer Output Power: 50W*2 + 100W*1
Subwoofer Output Match: 4-8 ohm
Audio Output: Terminals
Step 3: Parts Description Nut and Bolts
Nuts and Bolts
I used M4 nuts and bolts for attaching the handle to the side of the case. M4 x 40mm with washers and lock nuts x 2. Use threadlock to stop things vibrating loose, especially if you can’t get lock nuts.
I used M3 nuts and bolts to attach the speakers themselves to the case. M3 x 20mm bolts, locknuts, washers x 8.
I used nylon plastic M3 nuts, bolts and spacers to mount the amplifier board and cover. I used M3 x 12mm bolts x 4, M3 x 5mm spacers male to female x 4, M3 x 15mm spacers female to female x 4 and M3 x 10mm bolts x 4.
It can be easiest just to buy a big bag of the longest plastic bolts you need and cut some down to the shorter sizes you want rather than trying to source the right number of all the different sizes, Unfortunately that doesn’t work on spacers. Nylon plastic M3 hardware is available on ebay.
Metal
M4 x 40mm bolts x 2
M4 washer x 2
M4 locknuts x 2
M3 x 20mm bolts x 8
M3 washers x 16
M3 locknuts x 8
Nylon
M3 x 12mm bolts x 4
M3 x 5mm male to female spacers x 4
M3 x 15 mm spacers female to female x 4
M3 x 10mm bolts x 4
Step 4: Parts Description Wire
Wire
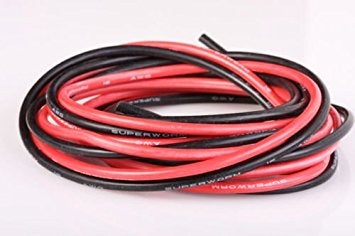
I used silicon insulated wire for all the wiring because I had some in various reasonably thick gauges. You can get it in different gauges easily on ebay. You only really need a couple of lengths in two different colours to wire the speakers to the back of the amp. I used 18awg wire which looks thicker than the wire used in most similarly sized speakers. That’s about as much thought as I put in to it; it’s not worth buying extra expensive speaker wire for this project (or any) and cheap speaker wire would work fine. 1 meter of red and 1 meter of black silicon insulated wire was enough for me. If the wire is too thin it could affect sound quality.
You may want a standard 3.5mm to 3.5mm audio cable to plug your finished speaker in to something if you aren’t using the bluetooth.
Step 5: Parts Description Velcro
Velcro
People often line the inside of speakers with fuzzy sound deadening material to cut down on echoing and resonance and improve sound quality. I happened to have a large amount of fuzzy sided sticky backed velcro lying around. I lined the inside of the speaker box with the velcro and I’m sure it sounds better as a result. If you can think of something better or cheaper than fuzzy velcro try that instead.
I had a meter of 5cm wide velcro I got from ebay which did the trick.
Search ebay for ‘velcro 5cm wide’ and don’t buy the stiffer high strength stuff.
Step 6: Parts Description Filament
Filament
This project uses just over 500 grams of plastic. You’ll need more than half a big reel of the stuff. The model itself is pretty low on detail so you don’t need super expensive filament to make it work. Any PLA that prints OK will do the job. PLA is probably better than ABS from an audio quality perspective because it’s a stiffer plastic. It’s also more likely to print the large pieces without them cracking, depending on your printer.
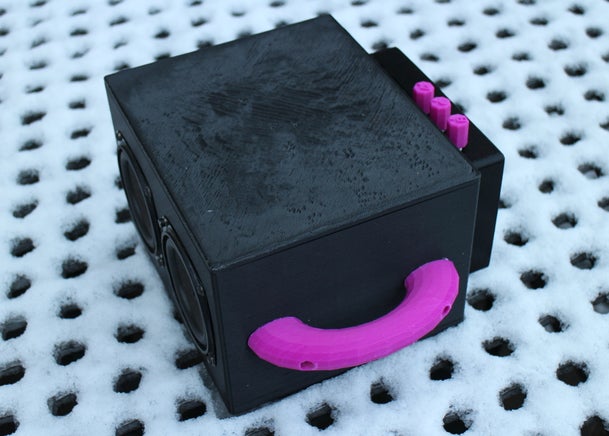
If you have two different colours of plastic you can use different colours for the handle and maybe the rear cover for the electronics just to improve things visually. I happened to have black PLA in stock and also some pink/purple ABS so I used ABS for the handle and electronics cover.
Step 7: Parts Description Power Supply
Power supply
If you can find an old laptop battery charger it should be capable of providing at least 50 watts at around 18 volts. This will power your stereo system just fine. Double check the voltage before plugging it in. You may need to hack the connector or find one with a right sized barrel connector to make it fit.
I happen to have old Lithium Polymer battery packs which I use for mine. A 6 cell 10,000mAh battery pack will power this thing for days once you’ve got the connectors sorted. I soldered a short length of wire to the positive and negative power input pads on the back of my amplifier board with the correct plugs (XT60) for my LiPo batteries on it.
Anyone on a budget can look for instructibles or videos on youtube on how to make Li-Io battery packs from old laptop batteries. With a little work you can make a decent 6 cell Li-Io battery pack that would power the amp for a while. This amp isn’t power hungry.
Step 8: Printing
Printing
Print the speaker box with at least 25% infill (more might be better) and support for the speaker holes. This is a low detail item so use the largest layer height your printer supports to speed up printing. I used small brims in Cura to help stick the parts to my heated bed.
Print the lid the same way you printed the box.
You could print the handle at a higher infill % if you wanted to make sure it was strong because it’s a smaller part and won’t take anywhere near as long as the other pieces.
The cover for the amplifier at the back should be printed the same as the box and lid.
The potentiometer knobs are optional as most amps come with these.
If have two different colours to use then the whole thing can look very good if you do the handle and maybe the electronics cover at the back a different colour to the rest of it.
The thingiverse files can be found here
And the tinkercad files are here if you want to make alterations
Time
It took me 27 hours to print the speaker box. 11 hours for the lid, 3 hours for the handle and another 6 hours for the cover for the amplifier. This isn’t a fast print.
Step 9: Post Printing
Sand down the edges and remove the support material Then it’s just a question of fitting everything together using nuts and bolts.
Getting the speakers attached with the eight M3 metal nuts and bolts is the fiddliest part because the lower nuts are difficult to put on the bolts. You will probably need needle nose pliers or similar tools to get the job down.
The handle is much easier to attach to the side of the box using the two M4 nuts and bolts.
When fixing the amplifier to the back (done last to protect it from damage) the nylon plastic nuts and bolts are easy to deal with. Use the short 5mm spacers between the amplifier and the speaker and the large spacers between the amplifier and the cover and everything else is self explanatory.
The lid is push to fit on the case. If your lid is slightly warped it may rattle at high volumes. I have wrapped my speaker box in tape to strap it all together in the past. The next version may have a screw down lid
The wires from the speakers need to push through the large hole in the back of the speaker box to join up with the amplifier. Make sure you get left and right and positive and negative the correct way around to ensure maximum audio quality. You don’t have to use different coloured wires for the speaker connections but if you did it will make your life easier now.
Step 10: Testing for the First Time
Make sure you’ve got a suitable power supply. Laptop power supplies make good choices if you can find one with the right sized connector on it (or hack the connector so it works). Double check polarity before plugging it in.
The 3.5mm line in is the most reliable way to test the amp for the first time. Turn the volume down on your audio input until you’ve worked out which potentiometer to turn in which direction on your amplifier to make sure your speakers don’t deafen you. Then gradually turn things up and enjoy the results. It may be worth checking you’ve got left and right the correct way around if your audio source lets you slide the signal from left to right. Don’t turn things up beyond the point you start getting distortion or you may blow something up.
Step 11: Taking It Further
Get hold of a suitable battery that can output something like 12 volts or so. Find an instructible on making a Li-Io battery pack out of old laptop batteries if you want to do it on the cheap. Then go outside and have a small party.
Build another one only without a second amplifier board. Rewire the speakers in each case to run in series or parallel depending on the ohms you need and run speaker wire from the dumb case to a channel on the amplifier on the other. If you have two 8 ohm speakers and a 4-8 ohm amplifier board like me then you run the two speakers in each case in parallel so they drop to 4 ohms to keep things in spec. Then you can run two speakers on each channel for four speakers total.

