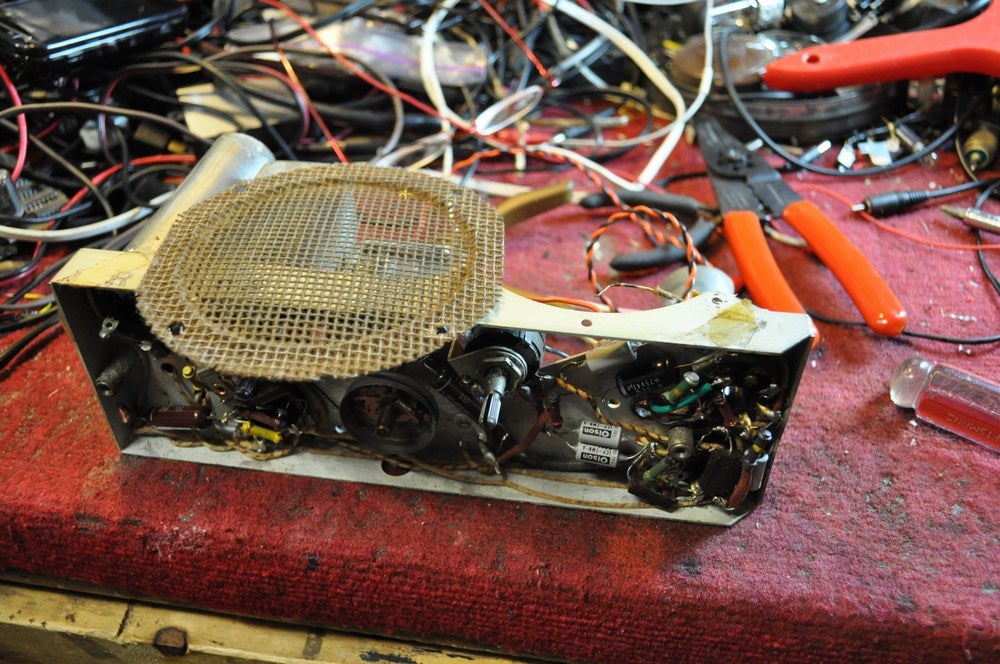
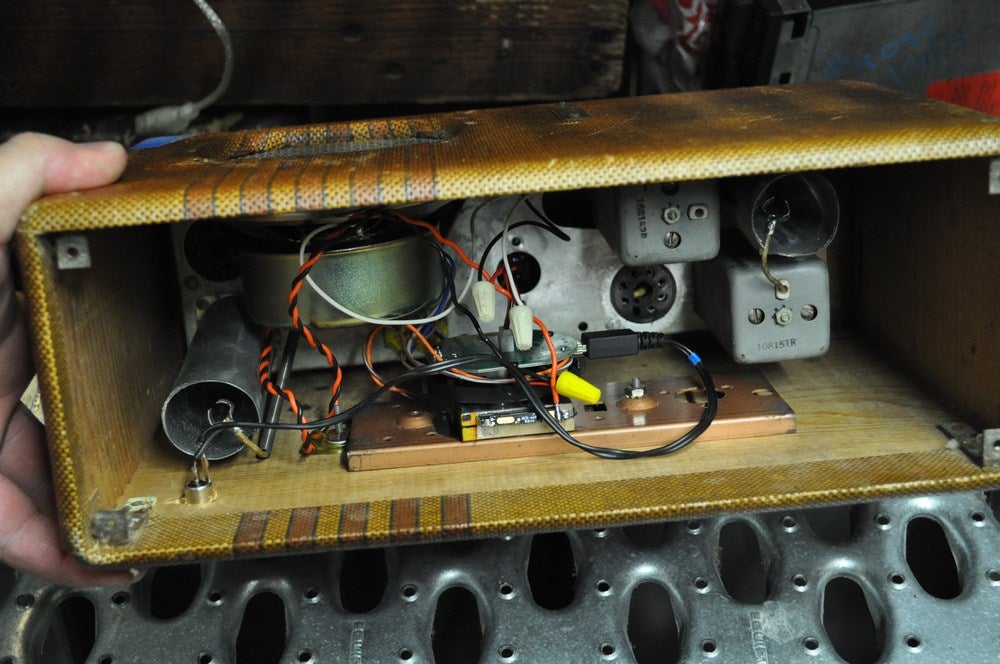
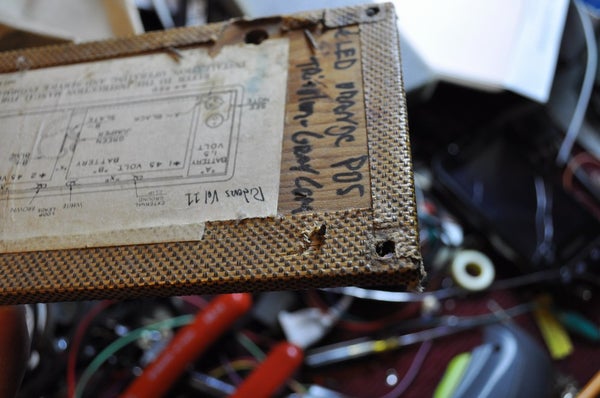
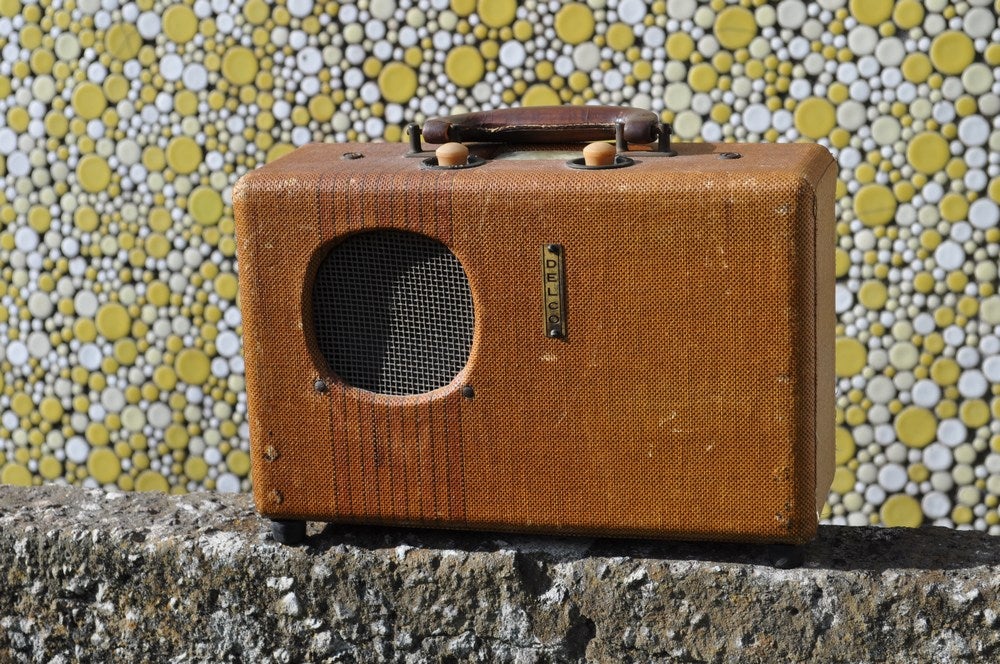
**this instructable will walk you through the process of turning a portable antique radio into a cool looking Hi-Fi bluetooth speaker. it takes into account that you have experience in soldering, working with basic electronics, and enough mechanical dexterity to be able to take things apart and put them back together successfully.**
what’s bluetooth?!?!?
i realize not every builder is tech savvy so here’s a quickie on bluetooth. bluetooth is a wireless data transfer protocol that uses the same radio frequencies used by 2.4ghz wireless internet (wi-fi) connections. it doesn’t work on a network, it connects devices directly to each other and is short range only. 10 feet is about average coverage for bluetooth devices. a bluetooth speaker must be “paired” to a device in order to work. it can be a bluetooth capable cellphone, ipod, computer, or other music playing device. for pairing instructions see the manual to your device.
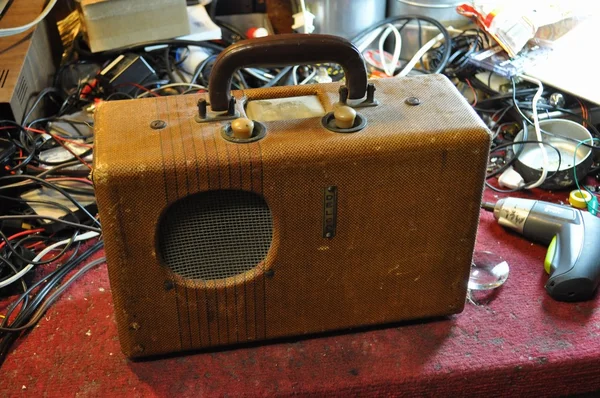
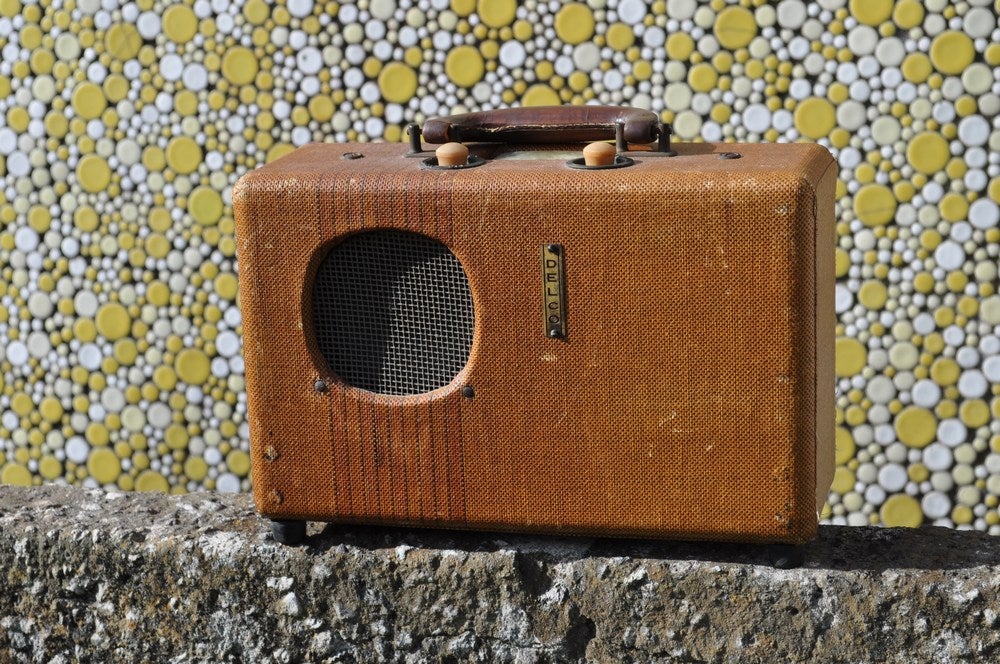
while normally i prefer to restore most antique radios that come my way, there’s a significant under-appreciation for antique tube portables. with few exceptions, most don’t bring much in the collector market and their isnt much love for them. i think they look quite cool. some, like the Delco model i used, are wrapped in tweed. what jazz lover doesn’t dig tweed?!?!?
my goal was to take this cool tweed covered AM radio, and re-purpose it into something that would look right amongst my other vintage gear yet serve a modern day purpose. i had been wanting a portable bluetooth sound box of some sort for a while and those panzy little extendo speakers didn’t suit my taste. i wanted something a bit cooler looking. that’s what led to this project!
so, onto the build out!
Step 1: What You’ll Need for the Build
at minimum, you’ll need a working bluetooth speaker with good battery life and a suitable portable radio. this would be bare minimum though and i recommend a few more items.
for my build out i decided i wanted long battery life and improved audio. for the battery i used a 3.7v lithium extended capacity phone battery. this battery spec’d out at 3500mAh versus the 500mAh battery that was part of my donor bluetooth speaker. this should give me about 10hrs playtime between charges at reasonable volume. the stock bluetooth speaker battery was good for maybe 2hrs or so.
for the speaker, i used a driver yanked from an old surround system. this speaker had a high compliance cloth roll surround. this will give me more low end and fuller sound. foam surround speakers are much more common but all eventually fail due to foam rot. i’m not a fan of foam surround speakers for this reason. i recommend going with anything other than a foam surround driver.
why not re-use the original radio speaker?
you can, but chances are it wont last very long and it will sound squawky. it was designed for half a watt or less of audio and not really meant for full range music. save yourself twice the work and just get a replacement speaker. even the cheapest bluetooth speaker amps easily put out more power than the old radio speaker can handle.
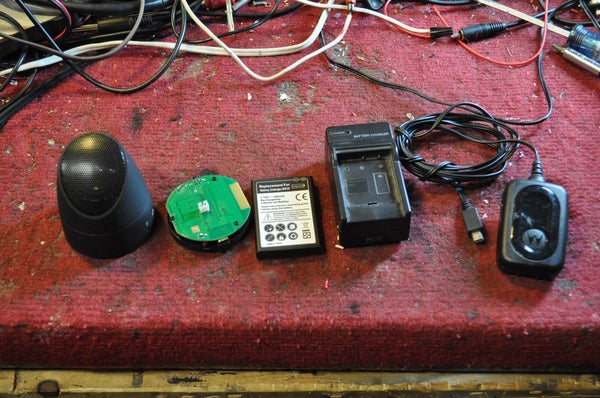
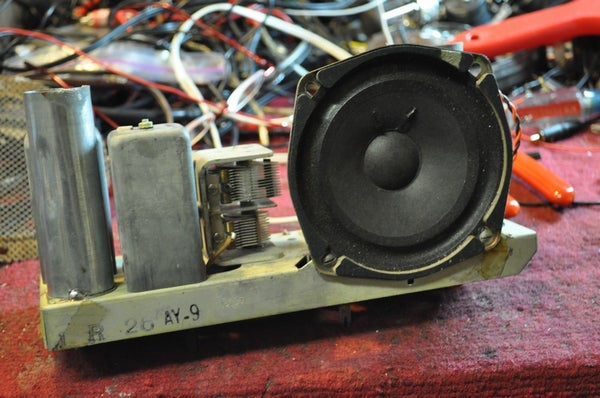
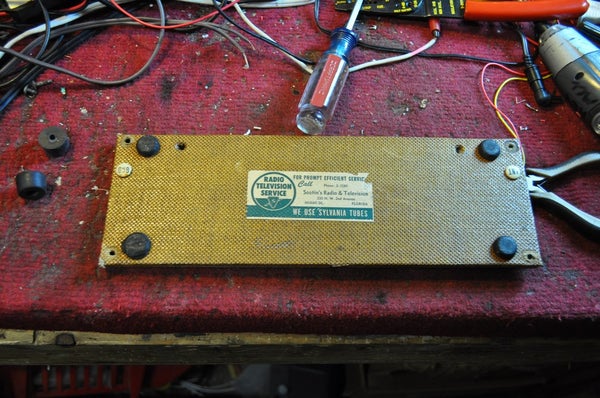
in pic 2 you see some of the items i laid out for this project. i ended up not using the stand alone charger but all the other stuff got used in this project.
a word about donor radios..
while most portable tube radios don’t get much love in the collector world, early transistor portables do. there were some lunchbox sized early transistor portables that at first glance may look like an old tube radio. these are obscure and hard to come by as they were really expensive in their day. if you do find one, don’t hack it. sell it off on ebay and you should have enough cash to buy two or three tube portables.
if you find a zenith transoceanic tube portable, those are valuable as well. the very early ones from before WW2 can bring hundreds of dollars on ebay. don’t hack a zenith transoceanic!
Step 2: Let’s Dig In!
antique portables generally come apart clam shell style. the back half of the cabinet opens to make battery replacement easy. tube radios ate batteries due to their high power consumption so it was expected the owner would need to get in there often. a few models allowed battery access from the bottom which is the case of my radio. a few others required you to remove the radio from its box to get to the batteries.
regardless of the way it’s done, you need to get into your radio. this shouldn’t be rocket science as they were intended to be user serviceable.
once inside, you need to evaluate what work is involved. can the terminals to the speaker be accessed easily? can the terminals to the power switch be accessed easily? the power switch is usually part of the volume control. if you are replacing the speaker (highly recommended), can it be swapped out without removing the chassis? if any of these tasks can’t be done without removing the chassis, then you know what the next step is right?
chassis removal..
you need to figure out what holds the chassis in place. these radios were built in the days of nuts and bolts not plastic tabs that break off. if you see fasteners holding the metal chassis of the radio to the wooden box, remove them. you may need to remove the knobs as well. most knobs should pull right off. if they wont budge, check the sides of the knobs for set screws. if they are there, loosen and try pulling again.
on very stubborn knobs that you are 100% sure have NO set screws (or at least you loosened the set screws), you may need to use two large flat head screwdrivers to apply equal pressure on both sides of the base of the knob as you pry it up. a shot of wd40 where it will get into the base of the knob may help. use heavy cardboard or cloth to protect face of radio while prying. there’s a distinct possibility something may break when prying off a stubborn knob. sadly, that’s part of the risk. if you break a knob, they can be found on ebay but it will set you back a few bucks and a bit of time searching.
some radios mounted the speaker to the box, some mounted it to the chassis, some mounted at both points. if your speaker has any pass-thru fasteners attaching it to the wood box, you need to take some additional steps.
pass-thru fasteners used a flat ribbed head that dug into the wood cabinet and gripped by friction. you do NOT want to break that long established fastener to wood bond if you can avoid it. once these pass-thru fasteners break free, they just spin making removal a real chore. on these types of fasteners it’s highly advisable you put a few drops of wd40 on each of the nuts holding the speaker down and give it a minute to soak. removing the fasteners holding a speaker to a radio cabinet can be a frustrating ordeal if you let it.
once the wd40 has soaked a little, you’ll need a small wrench or pliers to work the nuts loose. needle nose may be your only option if you lack the proper small wrench. while removing those nuts, reach around and take your thumb and apply pressure to the pass-thru fastener head to keep it from backing out and breaking its bond. once the nut has come loose, you no longer have to worry about the pass-thru fastener breaking its bite into the wood cabinet.
got the chassis out? good! onto the next step.
Step 3: Speaker Replacement
you can’t just drop any ole speaker in there if you want this to sound half decent. just like in any speaker replacement, you want a speaker that fills the original void, lines up with existing fasteners, and is compatible with your amp.
speaker selection..
find a replacement full range speaker that has the same bolt pattern as the radio’s old speaker. this shouldn’t be too hard as they have been somewhat standardized for years. your replacement should not only have the same bolt pattern, but it should also allow you to reinstall the original chassis back in the box. the reason for keeping the original chassis is it already has a perfectly useable on/off switch and on some radios, it serves as a mounting point for the speaker. keeping the original chassis means you don’t have to figure out how to attach the knobs even if they are just for decoration. it’s less work this way.
your speaker should ideally be a full range driver that can handle 3-5 watts. most of the popular little bluetooth speakers feature a 3 watt amp. if your replacement speaker has too low a power handling capability, you will eventually fry it. this is why you don’t want to use the radio’s original speaker. if it’s too high, it wont play loud. if you have limited options, it’s better to go with a higher power handling than a lower power handling. at least you won’t be digging into your project in the near future because you blew the speaker.
sources for speakers..
the cheapest and best way is to visit your local geek that strips old gear and raid his pile. another option is visit the local fleamarket and rummage around the vendors selling used stuff. if those options aren’t available, the local car stereo shop may be an option. ideally it’s better to source a speaker locally so you can have your original speaker in hand and match up the mounting holes exactly.
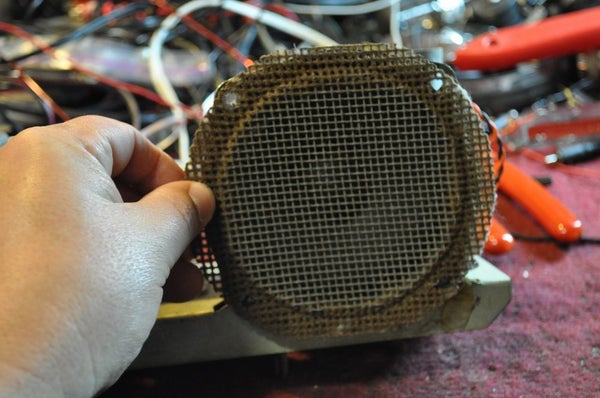
in the pics you see the replacement speaker in place and the original metal grill which we will be reusing, over the speaker. perfect fit!
Step 4: Hacking the Blue Tooth Speaker
for this project your ideal donor bluetooth amplified speaker is one of the common single speaker cylindrical shaped units that currently flood ebay for about $10-15 each. you don’t want a dual speaker “stereo” model.
AM radios are mono, most have a single speaker. by using one of the single speaker bluetooth units, you get around the hassle of trying to figure out how to take 2 channels of audio and feeding them into a single little speaker. you cant just join the wires coming out of a stereo unit together. it doesn’t work that way with the class D amps found in these bluetooth devices and you will likely trip the protection circuit in the amp chip. if you simply use only one of the speaker wire sets coming out of a stereo unit, your music will sound weird as you’ll be missing half of it. save the headaches and get a mono single speaker unit. they already have the stereo combining circuit in them.
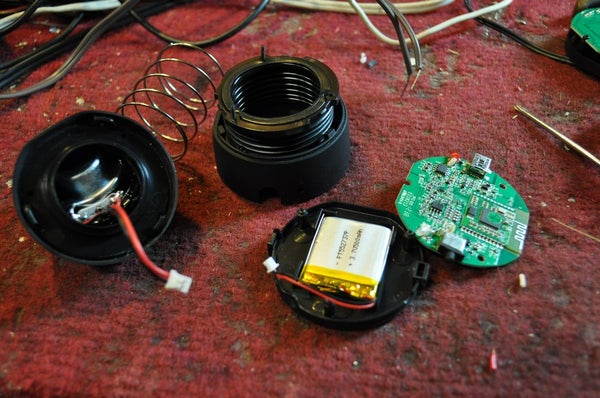
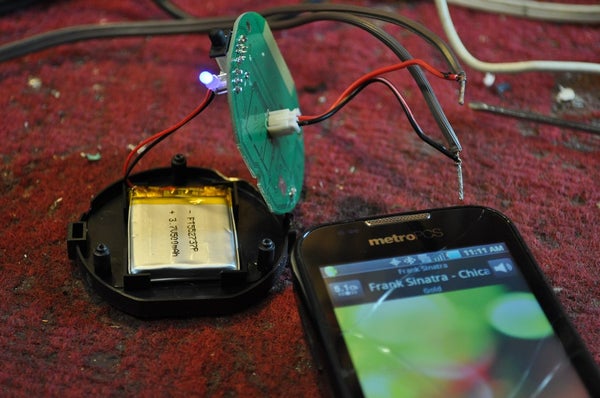
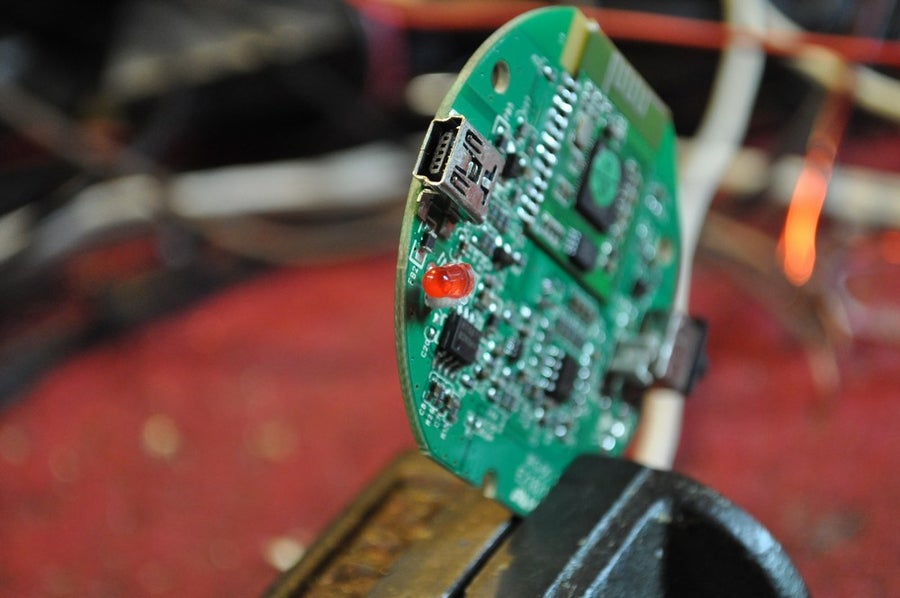
in pic 1 you see my donor bluetooth speaker pulled apart. most of these single speaker units feature a bluetooth receiver, lithium rechargeable battery, charging circuit, class D amp, and status indicator LEDs. the amp on most of them is based around a 3 watt class D chip that features a distortion limiter. this is nice as it keeps the audio from clipping severely when cranked up. the bluetooth speaker i used was an Auvio 4000 from radio shack.
save money and be green!
ask your friends if they have a bluetooth speaker that no longer works. i’ve found that often times what’s wrong with them is the battery gave up from sitting in a discharged state or the little speaker driver is blown from abuse. you won’t be using the original speaker so who cares about that and in my case, i opted to increase my battery capacity so the included battery was irrelevant.
test it!
first try it and see if it operates as intended. if it doesn’t, you need to open it up cut the wires off the little speaker and wire in a test speaker. in pic 2 you see my unit working off the original battery once it was charged via USB. turns out my units had bad speakers.
it is possible your unit may have a battery that is so bad, it’s shorted. if it won’t take charge and it wont operate even if connected to a USB charger or computer, you need to open it further and disconnect the built in battery. once the battery is unplugged, try powering it off USB and see if it comes up and pairs with your music player. if it still doesn’t work and you are sure your bluetooth player is working, you may have a dead unit and need to seek another.
a word about device pairing..
i’ve found that these bluetooth speakers have about a 20 second or so window from when you first turn them on, that you can pair them with your player. put your player in bluetooth discovery mode, turn the bluetooth speaker on, once it finds it, “ok” the connection. if you wait too long, it will time out and won’t pair till you power cycle the bluetooth speaker.
it works? great!
you’ll be doing further work on this unit to relocate the status LED’s and swap out the battery if desired.
Step 5: Upping Battery Capacity
why increase the battery capacity? more battery capacity = more play time.
the battery used in bluetooth speakers is generally a 3.7v lithium rechargeable. fortunately, this is an extremely common battery type for cell phones and other small portable rechargeable devices.
WARNING!
lithium batteries can explode if improperly charged. if you feel uncomfortable experimenting with lithium batteries, buy a new bluetooth speaker so your assured a good battery and skip this section.
still here? ok, let’s increase battery capacity!
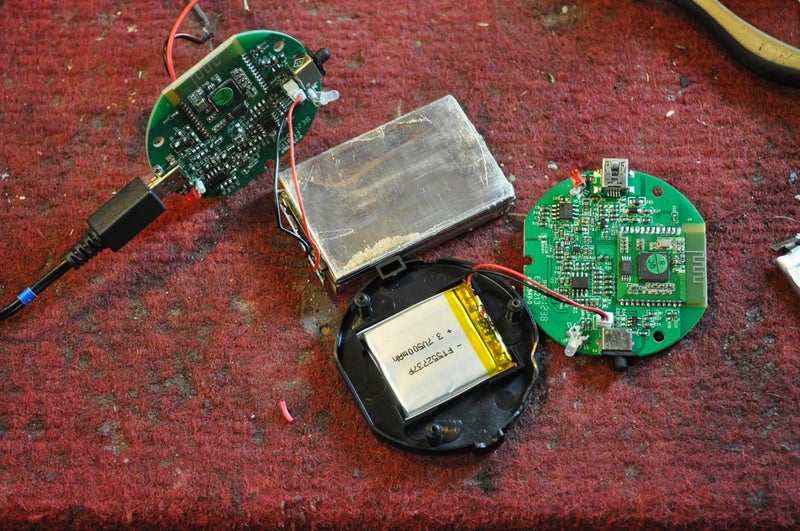
in pic 1 you see the original battery in its black plastic housing. above it you see a silver rectangle which is my replacement battery. the original battery was rated at 500mAh while the replacement is rated at 3500mAh. that’s 7 times the capacity of the original. it should give me 10hrs+ play time on one charge.
i sourced my battery from ebay. it was a high capacity replacement for a samsung cellphone. they are fairly cheap on ebay. look for a battery that fits a current model cellphone so you’re assured fresh stock. carefully open the replacement battery using your finger nails to peel back labels and try to pry the case open. these are usually glued together and can be opened without using sharp tools.
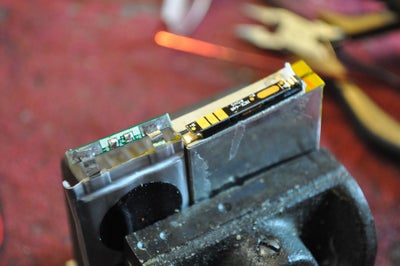
look at pic 2, both batteries are pictured upright in a vise. (if you use a hobby vise to hold things while you work on them, do not tighten it on the batteries. they are quite delicate.) note how both batteries have a tiny circuit board. that is the charging circuit. if your old battery has a charging circuit, make sure the new battery has one. can they be transplanted? maybe. i didn’t test that though so your on your own. lithium batteries are very sensitive to improper charging so i wouldn’t mess with that if its not needed.
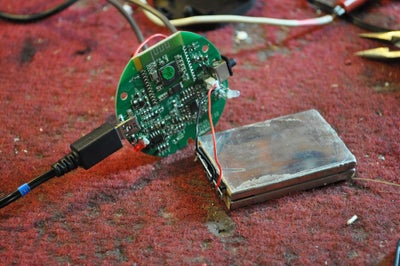
take your meter and check polarity. move the leads from the old battery to the corresponding terminals of the same polarity on the new battery. you should be seeing about 3.7v on the correct terminals. note that there can be two sets of terminals with power on them. one set is tied directly to the battery, the second goes through the charging circuit. you want the terminals that go through the charging circuit. once done transferring the leads, plug it into the bluetooth circuit board and plug in your USB charger. see pic 3.
keep in mind that a wiring mistake here can cause the battery to explode so be very sure of your work.
if all went well, the charge light should go on. let it charge fully. this could take a while (hour or more). this will verify that your new battery will charge and that everything in the charging circuit is ok. once the charge light goes out give it a sniff test. sniff around the circuit board and battery. there shouldn’t be any overheated electronics smells emanating from your contraption.
once it’s done charging, re-test that it does indeed still pair with your device and you can play music through it. all good? onto LED relocation.
Step 6: Moving the Indicator LEDs
this step is NOT necessary for this project to work but it does add much to the functionality. by relocating the LEDs somewhere visible, you’ll be able to see when your device is connected via bluetooth, when it’s on, and when it’s charging. all handy but not needed to make it work.
there is fine soldering involved here. you may want a magnifying lamp and fine tip soldering iron for this step.
on the Auvio 4000 bluetooth speaker, you have a red/blue status LED and a red charging LED. what i did on my project was solder in long wire leads and relocate those LEDs to the face of the radio. LEDs are polarity sensitive so make sure when doing this, that you keep track of what wire goes on which leg on the LEDs.
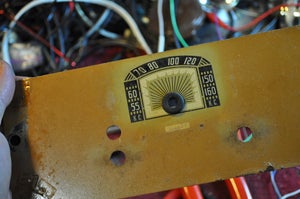
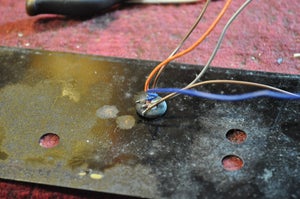
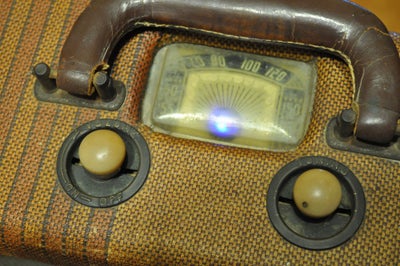
what i did on my radio was to find a rubber grommet that fit in the dial pointer hole. i had to remove the radio dial pointer and dial face from the chassis to do this. once that was done, i stuck the two LEDs i had already wired, into the rubber grommet. be careful that no LED legs are touching and shorting. i used epoxy to coat the whole assembly and lock it in place.
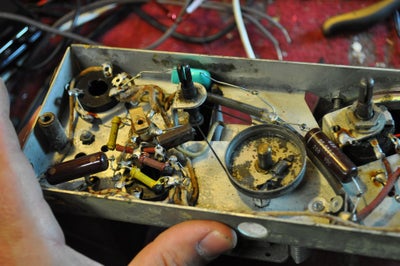
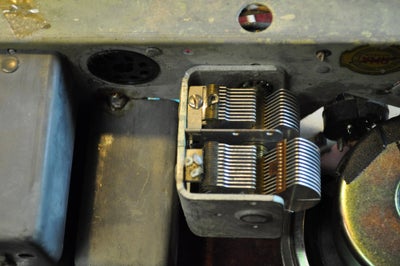
while the epoxy dried, i removed the shaft that used to protrude through the dial pointer hole from the chassis. in this case, the shaft was part of the tuning capacitor so that had to be removed.
pic 1 – bluetooth circuit board showing the charge LED
pic 2 – rubber grommet installed in dial face
pic 3 – charge and staus LEDs epoxied in place on dial face from backside so they shine to the front of the radio
pic 4 – LEDs wired to circuit board
pic 5 and 6 – tuning cap that had to be removed so LEDs could take it’s place.
pic 7 – the end result. something that stands out when it needs to and fits in when it’s off
all wired in? test it and make sure the LEDs still do what they did before. if they don’t, recheck your work. you may have a flipped wire.
some artistic advice..
on my radio hack, i was trying to keep it as vintage looking as possible. while i wanted the status indicators, i didn’t want them to attract attention when the thing was off. i decided to NOT clean the inside of the dial window and leave all that vintage dust in there. when the unit is off, it looks like any of the other 20 or so antique radios i have around the house.
Step 7: Power Switch and Charging Options
ah.. more choices to make..
the simple non-elegant way..
do nothing and just resort to opening the case of the old radio when you wish to charge the bluetooth speaker unit or switch it on.
the elegant way..
wire in the old radio’s power switch and add a charging jack. i took this path as i wanted my device to look as vintage as possible while doing it’s new task. as an added benefit, not having to be opening the radio constantly is real nice.
on the radio chassis you should have at least two controls, one for tuning, and one for volume with a power switch built in. use your ohm meter on continuity test to figure out which two terminals on the volume/power control are for the power switch. remove the old wires and solder in two new wires long enough to reach well past where you will be mounting the circuit board and battery for the bluetooth unit.
splice those switch wires in to your power leads coming from the battery pack. if you’re unsure how to do this. you will be taking ONE of the two wires from the battery pack, whichever of the two wires you wish, and cutting it in the middle. strip the ends of those two wires. now take the two wires from your switch, one switch wire goes to the free wire coming from the battery, the other switch wire goes to the free wire coming from the circuit board.
switch the power switch on the bluetooth board to on and leave it there. wallah! now the original power switch from the radio can be used to control your device. the old radio power switch now cuts the power on and off to the bluetooth board.
what about charging?
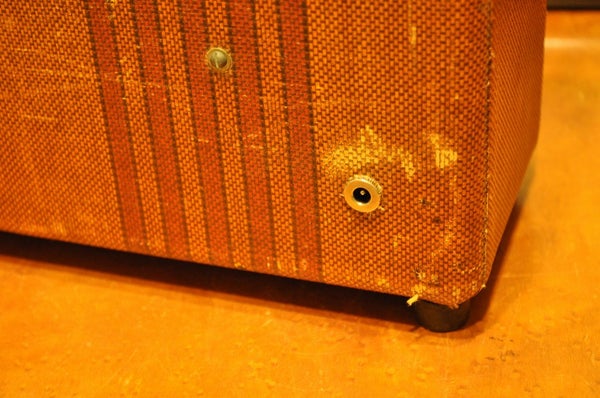
on my unit, i used a metal chassis mount barrel plug connector (pic 1) from radio shack and mounted it on the back of the cabinet. i also purchased the corresponding female plug that goes with this connector. this chassis mount connector is shiny but it’s all metal and really doesn’t look too out of place being at the back. i used an old motorola USB wall charger as my power supply for this project.
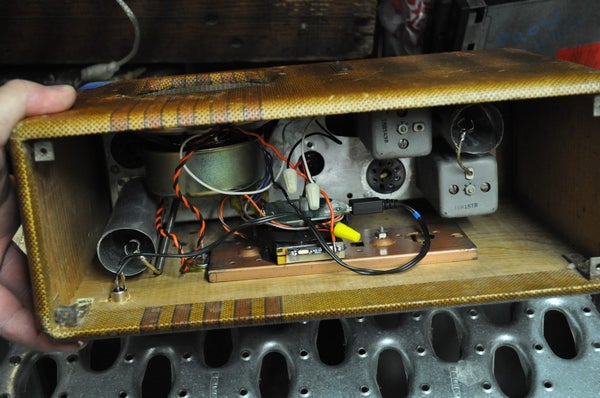
in pic 2 on the bottom left inside the radio box you see the back of the charging connector and the wire coming from it with the mini USB plug plugged into the circuit board.
take the USB charger and plug it into the bluetooth board. measure out how much length you need to reach where you will be mounting your charging jack. cut the wire at that point and solder it to the barrel plug chassis connector you just mounted. look closely at the wires you just soldered in. one will have a white stripe on it. is the wire with the white stripe connected to the center pin of the connector or the outside portion of it? this is important. write down your result.
now take the wall plug portion of the power supply and look for the same white stripe markings on it. you want to solder the wire with the white stripe to the part of the connector that will mate with the white striped wire on the other half of the connector. this is very important you get it right the first time. flipping these wires will likely mean death for the little circuit board. if you find this part confusing, get help from a fellow geek good with electronics.
if you completed both steps without hitch, your bluetooth unit can now be switched on and off using the original radio power switch and you have a spiffy metal charging jack on the back so there’s no need to go poking around in the radio to turn it on.
quirks..
whenever the unit is plugged in, it will be on. in order to charge, you must be plugged in and the power switch on the radio must be in the ON position.
Step 8: Everything Checks Out?
at this point you should have a speaker your going to use, relocated the LEDs if you were going to do that, and replaced the battery if you were going to do that. now bench test it all. play it loud. does everything sound ok? are the status LEDs doing what they are supposed to do? no rattles from speaker? all good?
now mount it all inside your radio box. this may be a trying bit of work as you have to juggle everything back into the box, line up the speaker to the old fasteners if needed, and don’t forget the grill if it had one. once the old chassis and speaker are in, then mount the new stuff in place.
if you mounted your new gear to the old chassis while it was out, you saved a step. being this is my first one of these, i lacked the forethought and did things the harder way. on my next build you bet i’ll be streamlining things!
in the case of my radio, there were two bolts coming into the back with no purpose. i think they may have been for holding the old long gone battery pack in place. they served as an excellent mounting place for a bracket.
i took a piece of scrap metal from my radio carcass pile that fit and epoxied the battery and circuit board to it. yep, epoxy. it’s a bit crude but it does a great job of holding light odd objects together. epoxy does make service a pain but there’s so much room in the cabinet that if something should fail, i can probably stuff another 4 or 5 bluetooth units in there and leave the old abandoned guts in place.
the trick to using epoxy for these projects is clean all mating parts with alcohol. this assures a good bond.
Step 9: While Waiting for the Epoxy to Dry Which Can Take Hours, Give Your Radio Some Feet.
old radios = old parts = hardened rubber feet if they are present at all.
on my radio the rubber feet were so hard, they chipped. i used new rubber feet from ace hardware to replace them. ace has them in black or white. i didn’t want to be hammering on this old box so i opted for the feet that require screws to hold them in place. my radio conveniently had 4 screws holding the bottom cover. it was just a matter of finding 4 slightly longer screws that would hold the feet in place and still thread in to hold the bottom cover.
the old feet on my radio are pictured in pic 1. to remove them, i had to straighten out the nails that held them in place and then carefully pry them out using a flat head screwdriver.
Step 10: All In, All Works? Enjoy!
i enjoyed mine while writing this instructable! the volume is just right for listening outdoors without blasting everyone. if you opted for the high capacity battery mod, you can take your vintage “boombox” to the beach or the park and listen for hours. it will likely outlast your phone or itouch battery.
just imagine the looks you’ll get when people see you toting a vintage portable radio and it’s playing loud and clear in Hi-Fi?
have fun guys!
into old tech? follow me on instagram as vintagetechguy to see random pics of interesting old tech.

